Showing posts with label Green Buttons. Show all posts

Monday, May 23, 2011

LILY PAD CARDS --Craft'sMeowChallenge - Embossing


Hello all-

I hope that you had a great weekend!  It went by so quickly but I was still grateful for it. 

Today's card is The Craft's Meow Challenge  and it's hosted by Lily Pad Cards.  The theme is embossing.  Here I used the 4 Leaf Grid Background Stamp by HeroArts.  I heat embossed it and then I tried to keep it simple with the sentiment and the button embellishments.  I love this color combination too!  Heat embossing is becoming my *new* favorite thing!!!

Thanks so much for stopping by and have a great day today!
Kimba :)

Monday, April 25, 2011

HeroArts Monthly Challenge - Masculine Cards


Happy Monday all-
 
Today is such a beautiful day here in NYC.  The trees are blooming and it's warming up and I welcome Spring with open arms.....
 
Today's card reminds me a little of Spring because of the orange....which just so happens to be my favorite color...TeeHee!  I created this card for the HeroArts Monthly Challenge.  The theme is A SKETCH CHALLENGE and MASCULINE PROJECTS.  You still have time to play, so check it out HERE.  The challenge also had an option of following a particular sketch and it could have any theme.  The card I made followed a sketch.  I love the way it came out - Clean and Simple and I love the way the colors work so well with each other.
 
I hope you stop by the HeroArts blog and participate in the challenge.  As always, thanks for stopping by and have a great Monday!

Tuesday, November 30, 2010

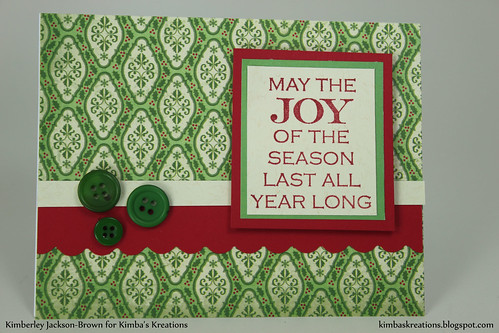
JOY ....25 more days til Christmas!!!!

Hello all--
Happy Tuesday.  Today's card is super simple.  All you need is some cool pattern paper and a stamp.  This is a great card when you are creating a large amout of cards.  So, if you haven't started on your hilioday cards as yet, this format is a great way for you to get it done quickly.
 
Thanks for stopping by!
Kimba :)
 
HOW-TO Instructions
Step 1: Base card measures 4.25 x 5.5 - Cover the entire front of the car with pattern paper
Step 2: Create scallop edge (RED) and a thin piece paper (CREAM) and adhere to card
Step 3: Stamp word sentiment - create mat in GREEN and then RED. Add foam dots. Adhere to card.
Step 4: Add buttons using glue dots


Thursday, September 23, 2010

CAARDVARKS Challenge - CLEAN and SIMPLE

Hey everbody....
It's Thursday and one more day til the start of the weekend. Hang on in there because Friday is only hours away!! I just love the weekends...can't you tell...LOL!

Today's card is one that I created to submit to a Clean and Simple card challenge that Caardvarks is hosting. The winner gets an AWESOME prize package of HeroArts Cling and wood block stamps. HeroArts is a fantastic company that offers a variety of wood block, clear, and cling stamps that are high quality and made here in the US. You gotta go and check out their website as well as their blog...it's packed with all sorts of yummy cards and techniques! You'll love it. I guarantee that you will be hooked and put both of them in your favorites!
So, without further ado, my Clean and Simple Christmas card. Thanks for stopping by!

Kimba :)

Wednesday, September 15, 2010

Just Saying Hello...

Happy Hump Day....

This week is sure flying by....wasn't it just Monday?..LOL!

Today's card is following the theme of Fall. I will miss summer, but must admit that I love the colors that Fall brings - the Olive greens, mustard Yellows, the dark Reds, and the Oranges (my favorite color)...they are so yummy!

I tried to imitate those colors in my card by coloring the leaves. I like the way it came out and hope you do too! Enjoy your day and thanks for stopping by!

Kimba :)

HOW-TO Instructions
Step 1: Base card measures 6.25 x 4.50 (KRAFT)
Step 2: 2nd Layer measures 6 x 4.25 (WHITE)
Step 3: 3rd Layer measures 5.50 x 3.75 (GREEN)
Step 4: Stamp tree image. Color with pencils. Cut out and set aside.
Step 5: Cut out circle using your Coluzzle. Adhere to center of card.
Step 6: Add foam adhesive to the tree image. Tie twine around the trunk of tree. Add button in center. Adhere to card.
Step 7: Stamp out word sentiment. Cut strip of cardstock. Run it thru your crimper. Adhere sentiment and then adhere to card. Add buttons on both sides.