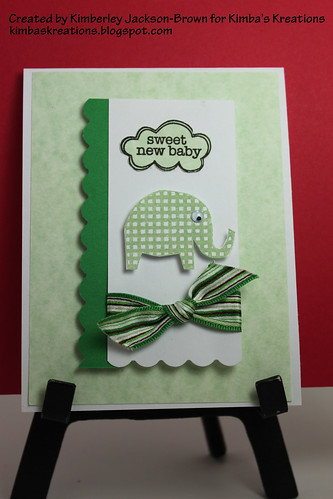
Showing posts with label Ribbon. Show all posts

Thursday, November 4, 2010

Merriest Wishes...


Merriest Wishes Challenge-November2010A, originally uploaded by kimba7669.

Hello all-

I just wanted to quickly post today's card before I run out.  I will be back later this evening to post the instructions as well as post a handmade gift that I created.  Make sure you come back and visit.  Look forward to your comments.  Please leave me some love....LOL!

Have a great day!
Thanks for stopping by!
Kimba :)

Tuesday, October 26, 2010

SWEET NEW BABY


SWEET NEW BABY, originally uploaded by kimba7669.

Hey everybody -

Happy Tuesday! Today's card, I stayed away from the holiday theme and created a card that I am sending to someone in one of my Yahoo Groups. It's a card that will be used for a new baby's arrival. I love this stamp set by
HeroArts. It is so sweet. I chose the light green since that is typically used when you don't know the sex of the baby and I can definetly see this card in a pink or blue color.....SO SWEET!

I hope you like the card. Maybe there's someone you know who is expecting a new baby and you can create this card to accompany the gift. I know they would love it!

Well, it's about that time. Thanks so much for stopping by!
Kimba :)


HOW-TO Instructions
Step 1: Base card measures 4.25 x 5.5 (White)
Step 2: 2nd Layer measures 4 x 5.25 (Seafoam Green)
Step 3: Punch Scallop  edge(Green). Cut cardstock and tie ribbon. Attach the card strip to the scallop edge.  Adhere to Base of card.
Step 4: Stamp elephant image and cut out.  Add googlie eye.  Attach using foam dots.
Step 5: Stamp word sentiment.  Cut it out.  Attach using foam dots.

Tuesday, April 27, 2010

Happy Mother's Day! - Distress Inks and CuttleBug Embossing Folder

Hey all-
This is the last of my Mother's Day cards, so I decided to go out with a bang!...LOL! This card I made in LITERALLY 5 minutes!...YES...you READ correctly...5 mins.

Head on down to the How-To Instructions and you will see just how quick you can create this card. As always, thanks for stopping by!

Kimba
HOW-TO Instructions
Step 1: Base card measures 4.25 x 5.5 (TURQUOISE)
Step 2: 2nd Layer measures 4 x 5.25 (WHITE cardstock) - Run this thru your CuttleBug machine using the embossing folder STYLIZED FLOWER
Step 3: Using Tim Holtz Distress Ink - DUSTY CONCORD, cover the embossed image and watch it pop! Add purple gemstones in the center of the flowers
Step 4: Stamp word sentiment and create a mat for it. Tie a bow and attach.

Monday, March 8, 2010

SPRING is HERE!!!


Good morning & Happy Monday!

Here in NYC it is a beautiful clear day. Today's high is 58 degrees and I am sooo happy that Spring is here. So, in honor of such a bright, beautiful, sunshining day, I have a created a card to match. I used yellows, greens, black & white. the stamp that I used is a HeroArts Block Stamp - A Real Poppy H2660. I stamped the flower using ColorBox Canary Yellow and I loved the way it came out!

So, I am outta here to run some errands and enjoy this day. Where ever you are, enjoy your day too! Thanks for stopping by!

Kimba :)

Monday, January 11, 2010

You are a Great Friend!


Happy Monday!!!

I hope that you all had a great weekend.

Here is my card for today! I love the color combination that I picked - pink & green! I used my Cuttlebug Embossing Folder - Swiss Dots as the second layer. Thanks so much for stopping by!

Kimba :)

Tuesday, December 29, 2009

Journal #2

Hello all -
Here is the first journal that I made using the glue. You are not able to see it, but the covers are slightly bent. I solved this problem by putting the covers between two large telephone books and then topped with a 20 lbs. weight.

Please, leave comments and let me know what you think. If you are interested in the measurements, please, let me know. I used Marcella 3D stickers that just so happened to go with the Anna Griffin paper I used. In any case, enjoy!

Thanks for stopping by!
Kimba :)

Monday, June 15, 2009

Butterflies,Butterflies, & More butterflies


Good morning all-
I just love butterflies! They are such pretty creatures. I created a card with them. I hope you like it and the steps and supply list is below. Thanks for stopping by! Kimba :)
Supply List
Brown Cardstock - Base Card Measures 5x6
Plaid Pink Pattern Paper - 2nd Layer Measures - 4 3/4 x 5 3/4
Pink Ribbon
Brown Scallop Strip of Cardstock - Measures 5"
Fiskars Scallop Punch
Martha Stewart Butterfly Punch (Brown Butterflies)
QUICKutz Butterfly Die Cuts
HeroArts Thank You Clear Design Stamps
Pearl Gem Stones
Cuttlebug Embossing Folder Swiss Dots
HOW-TO Instructions
Step 1: Create the base card
Step 2: Cut the Pattern Paper 4 3/4 x 5 3/4
Step 3: Cut a strip of Brown Cardstock 3x5". Use the Fiskars Scallop Punch to create the scallop edge. Adhere this to the pattern paper.
Step 4: Wrap the Pink Ribbon to the pattern paper slightly above the edge of the scallop strip. This creates a finished look. Attach the ribbon to the back using tape
Step 5: Cut the Butterfly Diecuts out and then run them thru your Cuttlebug using the Swiss Dots Embossing folder.
Step 6: Place Pearl Gems along the body of the Butterfly
Step 7: Use Foam Dots to attach butterflies to card. Bend the wings to give the look of the butterflies flying
Step 8: Punch out 2 butterflies from Brown Cardstock and adhere them to the wings of the larger butterflies
Step 9: Stamp your word sentiment and adhere to card using foam dots