Showing posts with label HeroArts Everyday Sayings CL342. Show all posts

Thursday, April 28, 2011

HeroArts Challenge - Layering Technique


Good morning all-

It's Thursday and that only means  - 1 more day til the start of the weekend..WooHoo!!!  I am so tired today...keep reading and you'll know why.

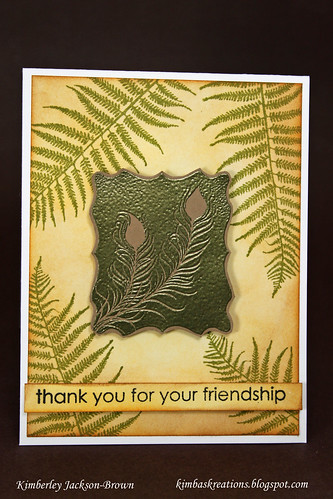
I was up last night,(started at around 11pm) at my crafting desk trying to create this card "in my head" that looked awesome....but of course, it just was not coming together. I tried to follow the sketch I drew, but it was just not happening. I had the stamp and the paper and the embellishments...but when I started inking up my stamp, I just wasn't feelin' it.  Anyway...it was about 1am and I went back to my desk and I picked up this stamp - HeroArts Little Feathers - and all of a sudden I came up with today's card in 15mins - NOW GO FIGURE.....(Kimba hits her head - DUH!) ...and this was not the original card I was trying to make....


Here's what I did. I distressed lightly the white cardstock firs, layering Orange Marmalade and then layering Vintage Photo around the edges. Next, I stamped the SILHOUETTE FERN using Peeled Paint Distress Ink in a random pattern. Lastly, I stamped LITTLE FEATHERS CG202 using VersaMark ink and then heat embossed it using OPAQUE powder - the color is PERIDOT....don't you just love the way it came out??? The details of the feathers are so pretty (if I do say so myself..LOL!)


Lastly, I added pop dots, and stamped a simple sentiment. CAS card....thanks for stopping by....and have a great Thursday!

Kimba

Tuesday, April 19, 2011

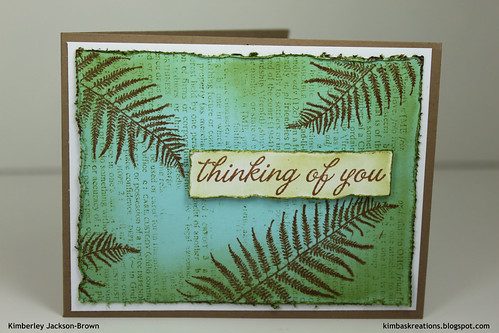
Thinking of You

Hello everyone...

How's everything going? I hope that you are doing much better than I have been...I have been so sick for literally the last two weeks. I now feel like I getting back to old self. I have been behind in so many many post, but I promise, I will catch up.

Today's card was a card that I submittend into a challenge, so I was not allowed to post it anywhere. But, now that the contest is over, I get to share my creation. I did alot of distressing using Tim Holtz's inks and I tried to keep the focus on the one stamp. That stamp is by HeroArts - Silhouette Fern  and it's so versitile.

Thanks so much for stopping by and enjoy your day!
Kimba :)


Wednesday, January 26, 2011

Paint Dabber Resist Technique

Hello all-
Happy Hump Day all!  Is it just me or is this week going by sooo slow?  I love the weekends  and so I want them to get here so fast..LOL!
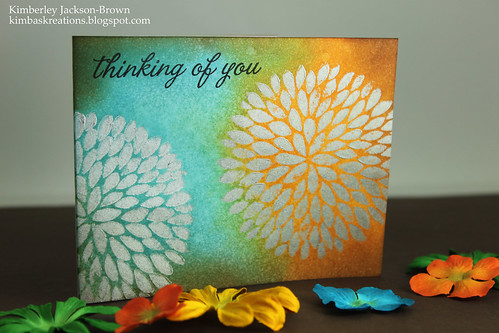
Today's card is a one layer card, and this is a type of card that I very rarely do...but it was super easy.  I love the way the it came out.  I used this technique that I saw Tim Holtz's do on one of his videos - he stamps an image using the paint dabber paint as the ink and then allows it to dry and then uses his Distress Inks on top.  It came out better than I expected.  Don't you just love it when that happens?
Anyway, thanks so much for stopping by!
Kimba :)
How-To Instructions
Step 1: Base card measures 4.25 x 5.5 - White Card stock
Step 2: Stamp the LARGE SOLID FLOWER - ink stamp up using Ranger's Silver Dabber. Stamp image and let dry.
Step 3: Distress the front of the card using Tim Holtz's Distress inks - Peeled Paint, Broken China, and Spiced Marmalade.
Step 4: Using a dry cloth, wipe off excess ink on the stamped flower image as see the image pop.

Wednesday, November 10, 2010

Hello...

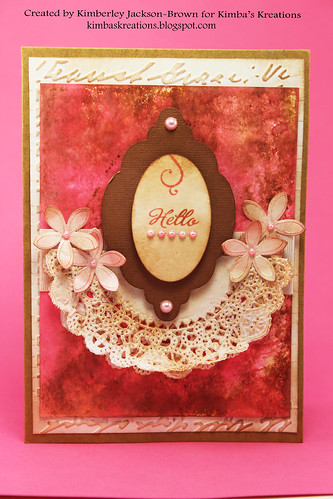
Hello November2010A Challenge, originally uploaded by kimba7669.
Hello all-

Today's card is going to be another quick post.  I have so much to do and so little time.  I am sure you know the feeling...LOL! 

On the card above, I created the background by using Distress Inks - Fired Brick and Vintage Photo.  I stamped  the inks on a craft sheet, spritzed the ink with water, and then laid the cardstock down onto the watered ink.  It creates a really beautiful water colored look.  Love the way it came out and I hope you do as well.

As always, thanks for stopping by and enjoy your Tuesday!
Kimba :)

PS - I just want to give you this tip - I ran out of Prima flowers so I used something called BRIDES TABLE CONFETTI - you can find this at Michaels in the Wedding section of the store.  I inked them up, added pearls and VOILA! Instant flower embellishment!

Thursday, September 2, 2010

Just a note.....

Mornin' all,

Hope you are enjoying this Thursday. Here in NYC, the kids go back to school on the 8th and I still can not believe that the summer is almost over. Time surely flies....
And today's card is a Just a Note.....I plan on sending this to my friend just to remind her that we are due for a GNO (Girls Night Out). This card was really fun to make because I get to color and that raccoon is so darn cute! I hope you like the card and as always, thanks for stopping by!

Kimba :)

HOW-TO Instructions
Step 1: Base card measures 4.25 x 5.5 (WHITE)
Step 2: 2nd Layer measures 4 x 5.25 (PINK)-adhere this to the base card
Step 3: 3rd Layer measures 3.75 x 4.5-run this thru the Cuttlebug using the Swiss Dots Embossing Folder-adhere to 2nd layer
Step 4: Stamp ribbon with the word sentiment and then tie in a bow
Step 5: Cut a small piece of the same ribbon and stamp XOXO
Step 6: Stamp, color, and cut out raccoon
Step 7: Punch out grass using Martha Stewart punch in green - adhere to bottom of 3rd layer
Step 8: Adhere all elements

Wednesday, September 1, 2010

HAPPY September 1st to YOU!!!!

Hello and Happy September 1st,

As promised, Kimba's Kreations is back and I am so happy about it! As you may have noticed (I hope you have) the blog has had a "face lift". We had to look good for our "coming out/back" party...LOL!! I hope you like what you see.

But, let's get right to what you came here to see: CARDS! CARDS! and more CARDS! And without further ado, here's is today's card. I really enjoyed making this card because I have a love for all things butterfly!! Butterfly stamps is the image that I have the most of. Everytime I see a butterfly stamp, I just have to buy it. Hey, that maybe a great theme to do for a week -hmmmm... gotta chuck that away in the idea file.

I hope you like the card and the one thing that I really liked about making this is that this is a card that you could "mass make". All you would need is pattern paper, circle punch, and your favorite butterfly stamp. You could do an assembly line to create this and of course your favorite sentiment.

As promised, the HOW-TO instructions are listed below as well as the supply list in the LABLES FOR THIS POST section. If you have any questions, please, ask away....and don't forget to leave me some love in your comments!

As always, thanks so much for stopping by!
Kimba :)

HOW-TO Instructions
Step 1: Base card measure 4.25 x 5.5 (WHITE)
Step 2: 2nd Layer measures 4 x 5.25 (PATTERN PAPER) - adhere this to the card
Step 3: Punch out Circle and then stamp the butterfly image onto circle. Adhere to the card.
Step 4: Stamp butterfly image onto white cardstock. Color butterfly. Cut out and adhere it to the stamp butterfly image on the circle. Bend wings a little to add deminsion and give the illusion that the butterfly is flying.
Step 5: Stamp word sentiment at the bottom of card